Post by popatachi on Nov 18, 2014 21:24:53 GMT
A guide on how I magnetized the head of a battlepod in order to accept various modules. This does not cover removing the parts from the sprue or removing mold lines.
I found it easier to add the magnet before the head is closed.
Tools
- File or some kind of metal push rod
- Pin Vice and drill bit to fit magnet
- Super Glue
- Magnets (2x1mm are being used here)
Step 1
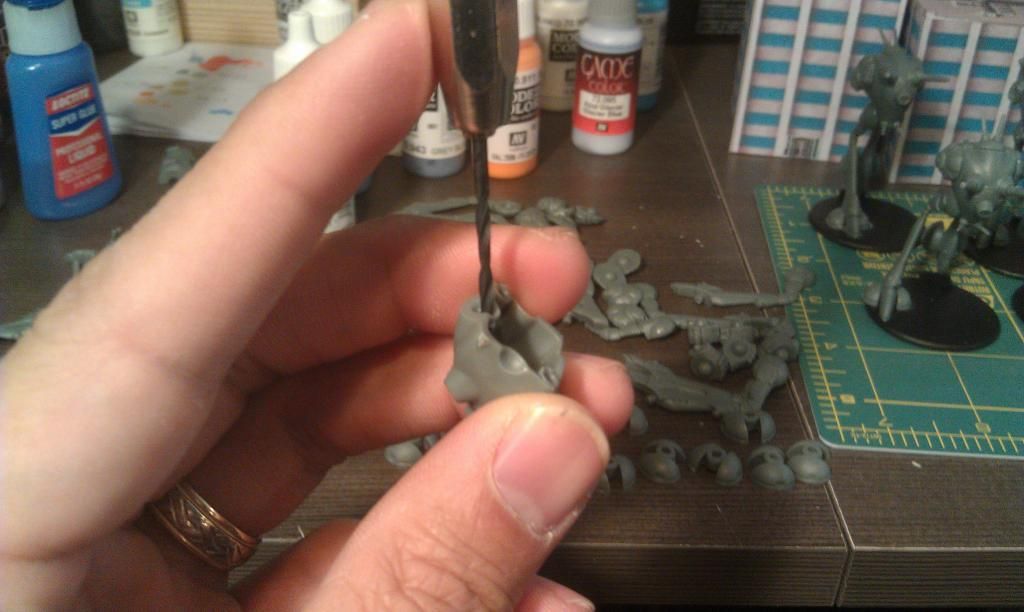
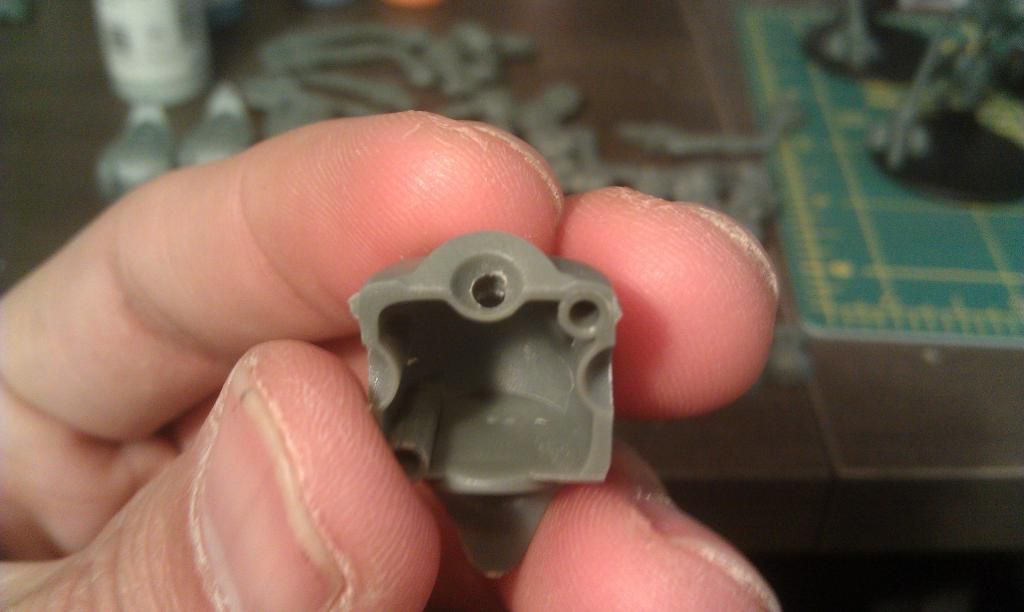
Tilt the head so that the circular depression is level and drill a hole straight through using the pin vice.
Step 2
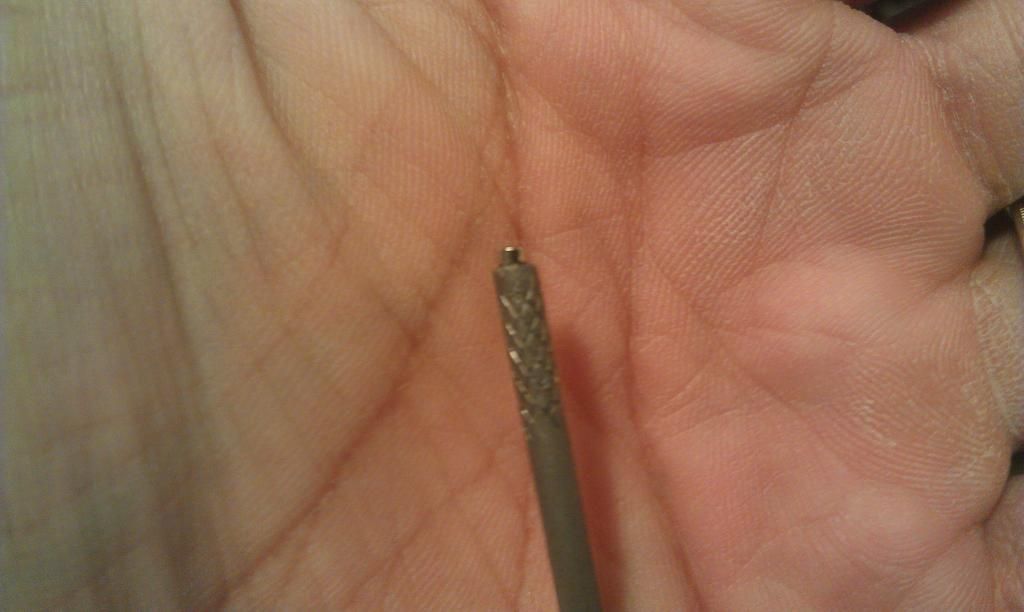
Prepare your magnet by making sure you have the correct polarity of the magnet set. In my case, I was pushing the magnet into the model, so the correct polarity had to be connected to my push rod, the end of a file is what I used.
Step 3
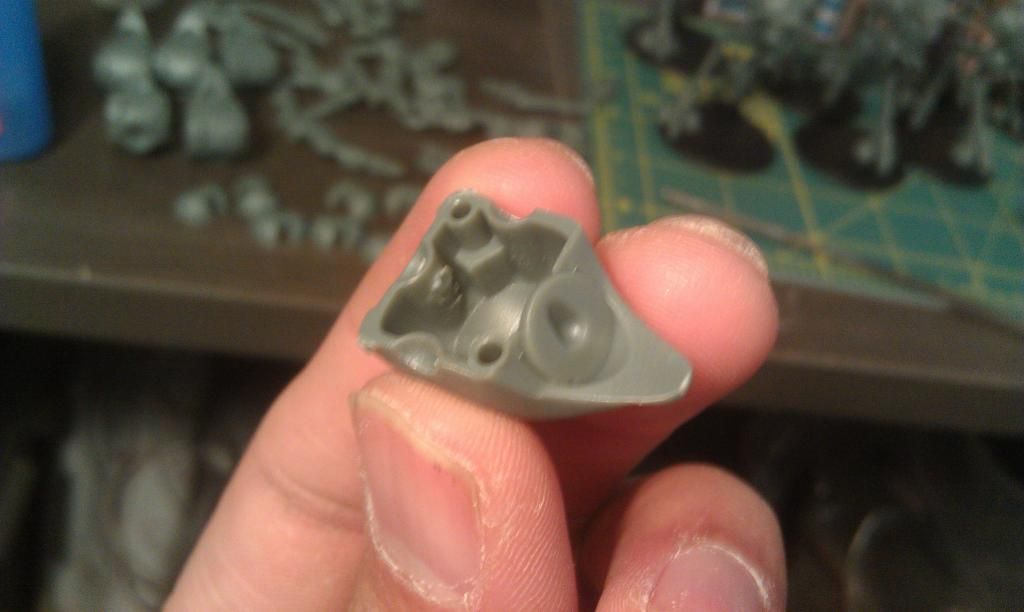
Clean up the interior and add a small dab of glue to the bottom of the hole through the inside of the head.
Step 4
Push the magnet into the hole and make sure it's lined up with the bottom of the circular depression.
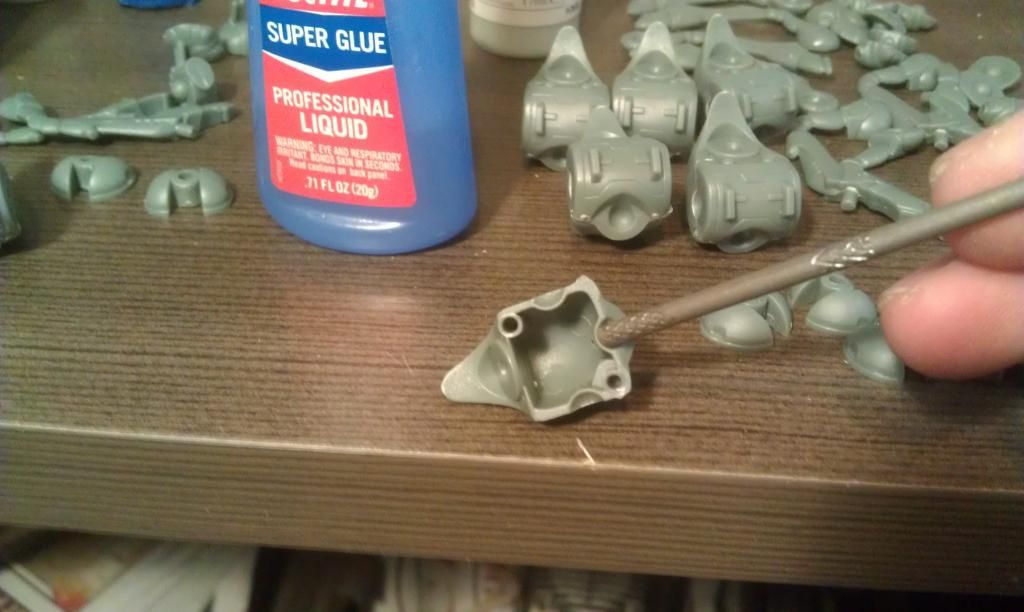
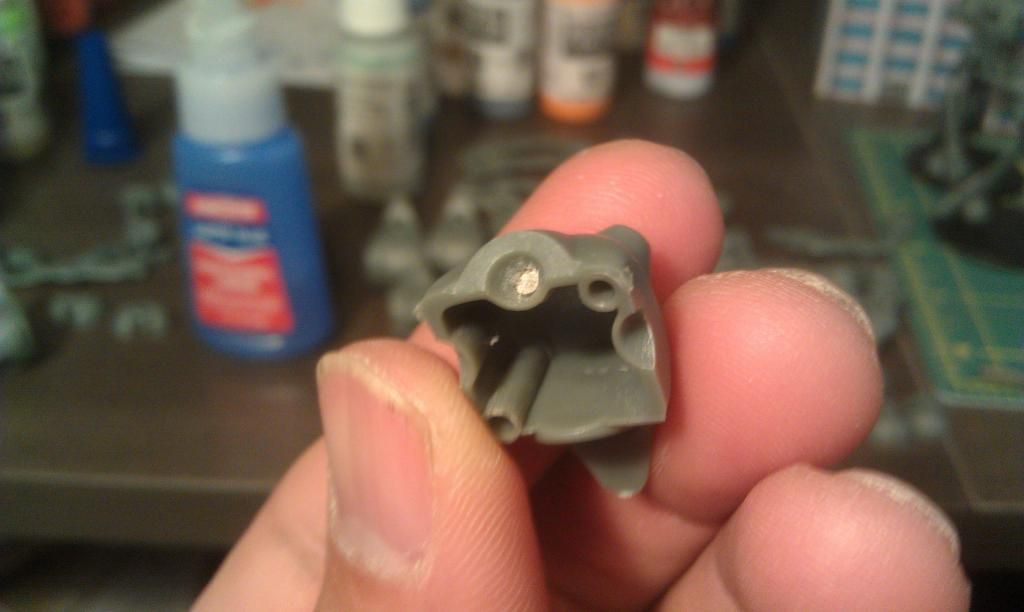
Finished
Now for the connecting parts. I'll use the head lasers.
Step 1
File/sand down the circular connection so that it's flat.
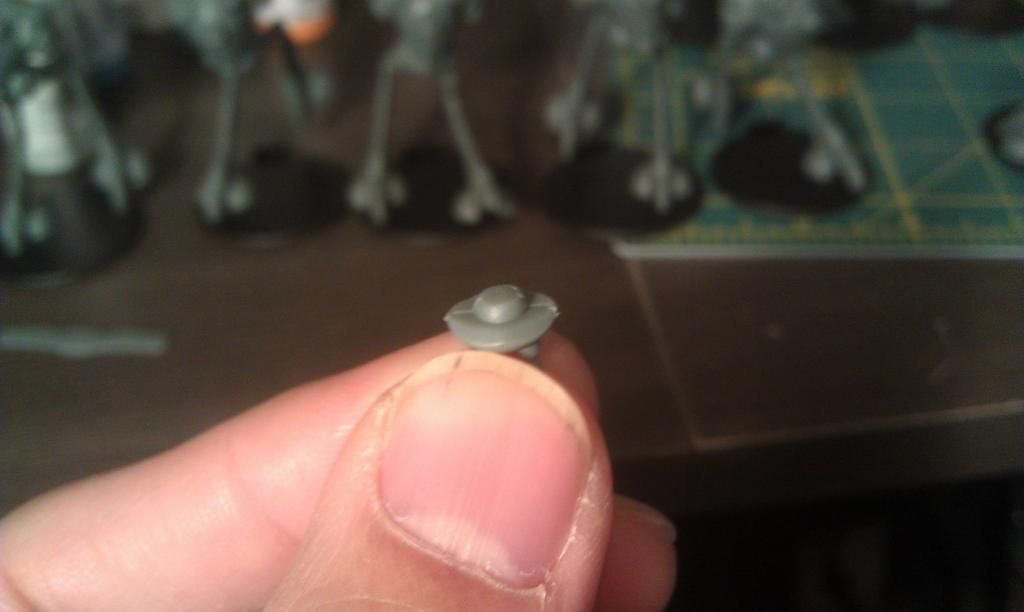 Step 2
Drill a hole as centered as possible into this piece. Do not drill all the way through, but it should be deep enough so that the magnet is flush with the surface. If you have trouble determining the depth, drill into a sprue to find the depth and then use a piece of tape around the drill bit to mark that depth. No guess work needed after that.
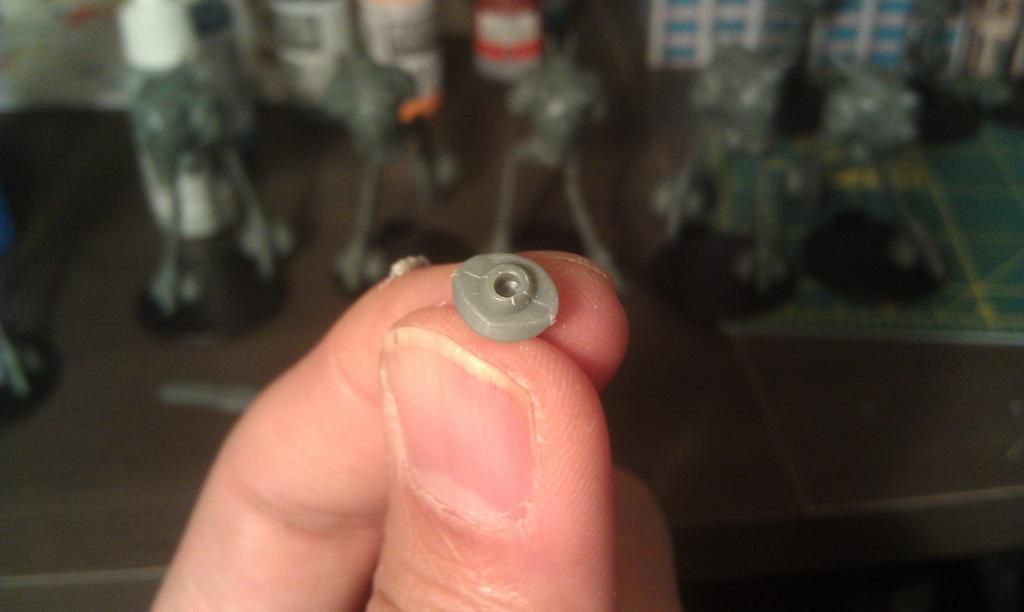
Step 3
Prepare your magnet by making sure you have the correct polarity of the magnet set. In my case, I was pushing the magnet into the model, so the correct polarity had to be connected to my push rod, the end of a file is what I used.

Step 4
Add a very small dab of glue to the hole and push the magnet in until it is flush with the surface.
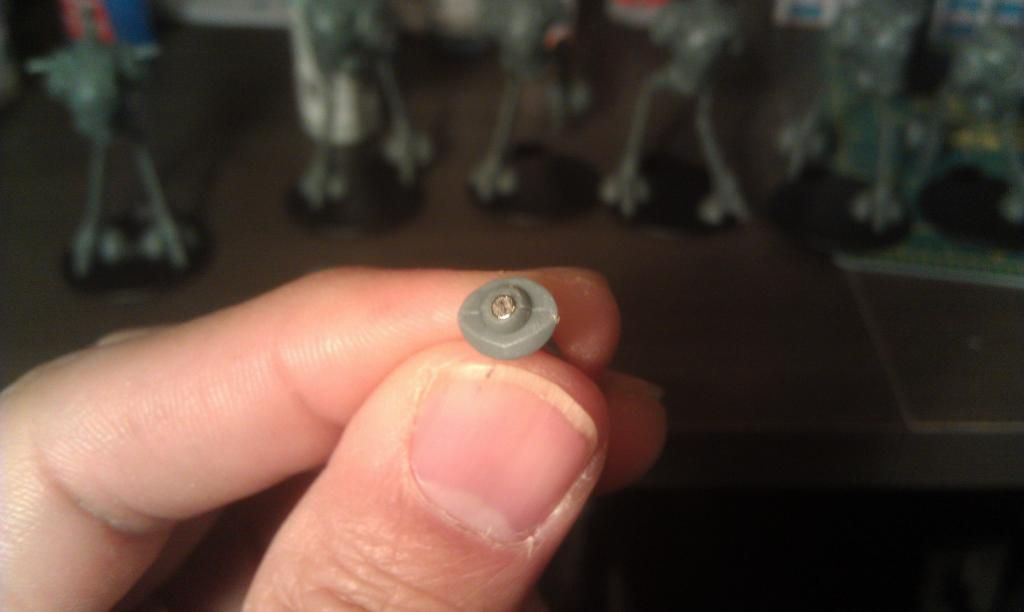
Finished
Test the connection and repeat as needed.
I found it easier to add the magnet before the head is closed.
Tools
- File or some kind of metal push rod
- Pin Vice and drill bit to fit magnet
- Super Glue
- Magnets (2x1mm are being used here)
Step 1
Tilt the head so that the circular depression is level and drill a hole straight through using the pin vice.


Step 2
Prepare your magnet by making sure you have the correct polarity of the magnet set. In my case, I was pushing the magnet into the model, so the correct polarity had to be connected to my push rod, the end of a file is what I used.

Step 3
Clean up the interior and add a small dab of glue to the bottom of the hole through the inside of the head.

Step 4
Push the magnet into the hole and make sure it's lined up with the bottom of the circular depression.


Finished
Now for the connecting parts. I'll use the head lasers.
Step 1
File/sand down the circular connection so that it's flat.
 Step 2
Drill a hole as centered as possible into this piece. Do not drill all the way through, but it should be deep enough so that the magnet is flush with the surface. If you have trouble determining the depth, drill into a sprue to find the depth and then use a piece of tape around the drill bit to mark that depth. No guess work needed after that.

Step 3
Prepare your magnet by making sure you have the correct polarity of the magnet set. In my case, I was pushing the magnet into the model, so the correct polarity had to be connected to my push rod, the end of a file is what I used.

Step 4
Add a very small dab of glue to the hole and push the magnet in until it is flush with the surface.

Finished
Test the connection and repeat as needed.

