|
|
Post by Vhermach on Aug 12, 2015 4:59:53 GMT
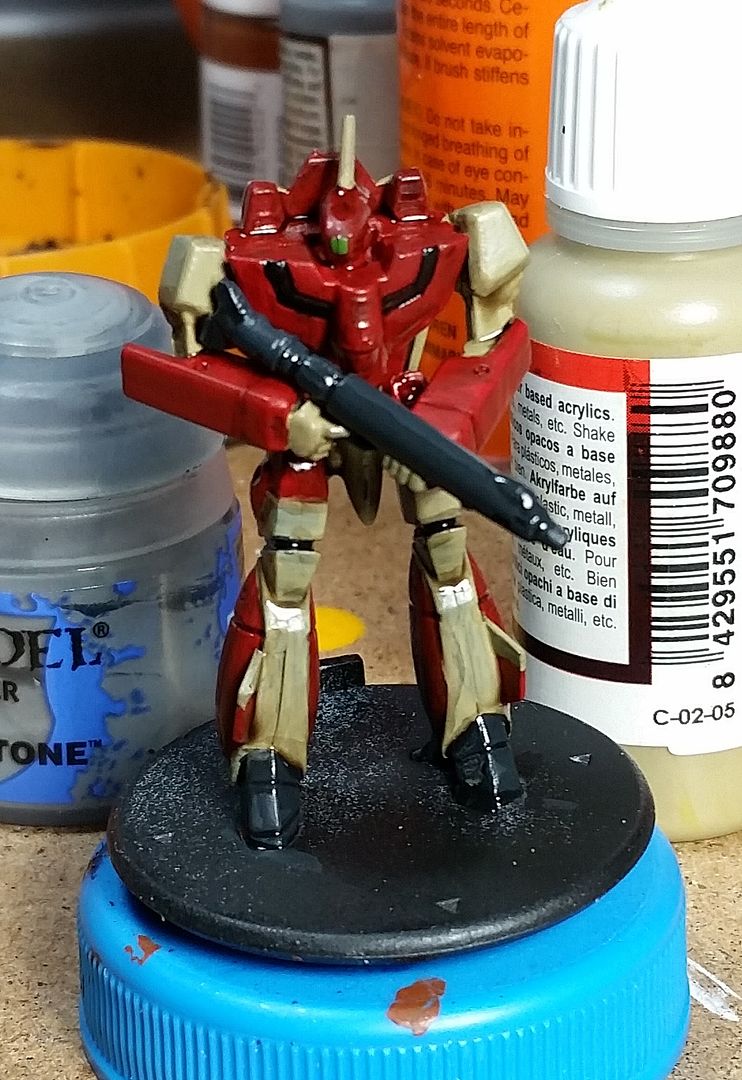
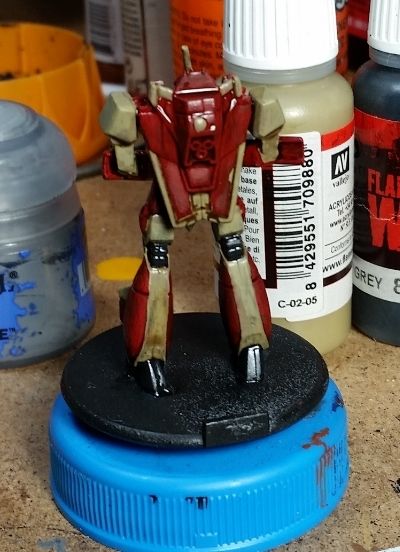
Greetings all, Vhermach here. This is my first Valkyrie I've painting and its still a work in progress. I cant seem to paint white to save my life, so I went with a khaki instead. Anyhow, here's what i have so far. next time i post, it will be done, or stripped and painted blue... who knows.   v |
|
|
|
Post by kaydubbaudriver on Aug 12, 2015 11:04:38 GMT
I think that looks great. White is a bear (at least for me) but I think the red and this khaki look great together.
|
|
|
|
Post by I Will Never Grow Up Gaming on Aug 12, 2015 19:33:38 GMT
White and Yellow are both difficult to get right, for sure. That Khaki is a good looking alternative!
If you DO want to do white (or yellow) and you're not doing it with an airbrush, try these tips I used;
1) Prime with white or gray (never black)
2) Thin your paints with a medium, not water. Thin them well.
3) Multiple very thin layers (you will not ever get full coverage with 2-3 coats without it looking horrendous. don't even try!)
4) let each layer dry well between coats
I found that when I did multiple thin layers (acrylic paint thinned with an acrylic matte medium, NOT water) it helped a LOT. It's still not as good as it could be and airbrushing will always look better, but it helps.
|
|
|
|
Post by Vhermach on Aug 12, 2015 21:06:31 GMT
Thanks guys. I appreciate you thoughts. My problem with painting these days is i don't have the patience to do multiple coats. I believe my days of painting super awesome models is beyond me. At this point in my gaming life, I want them to be done and on the field getting blown up!
Speaking of patience (and rather contrary to what i just said), i have no problem painting white with my Napoleonics because its just webbing or the occasional pompom. Big panels of white, no thank you...
Oddly, yellow i've never had a problem with. for some reason, my brain gets yellow. I have an Imperial Fists army that looks pretty spiffy. i based those guys in some random tan and then hit them with the yellow.
Anyhow, thanks to both of you guys. I look forward to getting the rest of the squadron painted up and posted. I may end up painting the officers with the white so they fit the customary 'im different' scheme.
v
|
|
|
|
Post by Vhermach on Aug 13, 2015 6:16:21 GMT
Got a bit more done tonight. Finished that first guy (minus decals) and started on his buddies. The 'J' i'm not too happy with yet but i will press on to see if he turns out swell enough. Otherwise, a quick bath in rubbing alcohol and he's ready to go again. V |
|
|
|
Post by kaydubbaudriver on Aug 13, 2015 15:08:37 GMT
Again, looks great. One thought, I think the stripe along the chest that you have in black would really pop if it was a bright color of some kind. Just a thought.
|
|
|
|
Post by Vhermach on Aug 13, 2015 17:11:18 GMT
Again, looks great. One thought, I think the stripe along the chest that you have in black would really pop if it was a bright color of some kind. Just a thought. I appreciate your thoughts. I happen to be thinking the same actually. I left his buddies alone until I figure out what I should do. That gray on the 'J' will likely turn into a 'white' tonight sometime. White... Looks like i will have to use Never Grow Up's advice after all. Overall, i have to say these guys are a lot easier to paint than i had initially thought. significantly more enjoyable to paint than to put together, but that's for a different thread... V |
|
|
|
Post by kaydubbaudriver on Aug 13, 2015 23:58:42 GMT
Putting them together is the devil, but a good paint job makes it worthwhile, even with the horrendous gaps (that I'm too lazy to try and fill).
|
|
|
|
Post by Vhermach on Aug 14, 2015 3:34:49 GMT
yah i hear you. i found plastic solvent glue works the best for the gaps, its the orange bottle in the background there. it slightly melts the two edges and you press them together. a little sanding after it drys and the gap is much less noticeable. i'm too lazy to fill them too. just need to be careful because the glue can get everywhere and really mess up your guy if you touch it while its still 'melted'.
|
|
|
|
Post by I Will Never Grow Up Gaming on Aug 14, 2015 13:30:01 GMT
Maybe .. just maybe .. if you lined the black stripe with light gray or white on each side (whitelining instead of blacklining!) that would make that black stripe pop quite well?
Just a thought.
|
|
|
|
Post by Vhermach on Aug 16, 2015 6:31:00 GMT
Got the first four battloids painted up, just need to apply decals now. I changed the 'J' to have a stone gray base and it worked out I think. Also, that stripe on their chest I just went with their base color. I like the way it works. Now on to the guardian models. Attachments:

|
|
cliff
New Member

Posts: 31 
|
Post by cliff on Aug 18, 2015 5:21:37 GMT
Looking quite good! Great job with the color scheme. These colors work well together!
|
|
|
|
Post by I Will Never Grow Up Gaming on Aug 18, 2015 14:18:20 GMT
Not to beat a dead horse on white (and I'll say your not-white choices work great with the scheme you have here!) but .. One other great suggestion that I've seen used to good effect (but not yet tried myself) is to NOT paint white, but rather paint a light gray .. then highlight it (edge highlight usually) with pure white. Gray goes on a lot easier and edge highlights of white bring it up a notch so that, to the naked eye at tabletop distance, it almost looks like it is ALL white with some bright highlights.
I definitely like the Gray stripe instead of black. It looks a lot more striking. Excellent work and a really nice colour scheme. Tan and Red/Gray and Red work well together.
|
|
|
|
Post by vagabondelf on Aug 20, 2015 22:45:12 GMT
Very nice! And a relatively unique colour scheme, which I always appreciate seeing.
|
|
|
|
Post by Vhermach on Aug 21, 2015 1:39:12 GMT
Thanks to all for the comments. Starting to hit the guardian models now. These guys are a bit harder to paint than i thought they would be. To get all the bits on the underside has been painful. Attachments:
|
|
|
|
Post by Vhermach on Aug 21, 2015 4:08:20 GMT
Moving right along. these guys will be done soon. woot! V Attachments:
|
|
cliff
New Member

Posts: 31 
|
Post by cliff on Aug 21, 2015 22:04:16 GMT
Those latest ones are looking quite good.
One of the suggestions I can make for handling those tough to reach places is to paint in sub-assembly. By that, I mean, assemble the parts that are the same base color or are at a major joint (like fusing leg halves together) but try to paint these before you do the final assembly. It can be a little fiddly, but if you drill small holes in the joint areas and use wooden skewers (the wood tip will hold the piece pretty well as long as the hole is smaller than the skewer body) you can better handle these smaller sub-assembly parts and spray and/or brush paint them individually. This gives you a lot more access to the parts that are harder to reach once the model is fully assembled.
That's actually one of the advantages of these models. They come in enough separate parts that you can use a sub assembly paint method effectively.
|
|
|
|
Post by Vhermach on Aug 24, 2015 4:48:54 GMT
Thanks Cliff. I've decided on the next set of guardians I'm not going to base them until they are painted. that should do the trick. And speaking of guardians, i've finished the first squadron. On to fighter mode... Attachments:
|
|
|
|
Post by I Will Never Grow Up Gaming on Aug 25, 2015 4:29:45 GMT
Looking good.
Definitely take the sub-assembly painting approach for Guardian mode. Even un-based, getting between the legs can be tricky.
I also like to paint the fighters before putting the GU11 underneath and then basing last.
|
|
|
|
Post by vagabondelf on Aug 25, 2015 18:48:58 GMT
Thanks Cliff. I've decided on the next set of guardians I'm not going to base them until they are painted. that should do the trick. And speaking of guardians, i've finished the first squadron. On to fighter mode... Good lord, you're painting those based? I was impressed before, but now I'm truly impressed. I paint mine with the arms and external stores still unattached. Arms don't go on until after decals, actually, because getting that "UN SPACY" on the leg with the arm in the way is essentially impossible. I do love the look here, though. |
|
|
|
Post by Vhermach on Sept 3, 2015 17:18:31 GMT
Almost done with the first four valks. I've really slowed down for some reason. But, i just need to finish the highlights on these guys and they will be done. Basing, i dont know yet. Meh, I'll deal with those once i'm done with 80 points of Zents. As a side note, I started watching the first Robotech series while painting my dudes. Over the past week or so, i've watched the entire first series, 35/6 episodes. And i've put together 11 Zents and painted these four fighter modes. Perhaps thats why i've slowed down so much... anyhow... V Attachments:

|
|
|
|
Post by Vhermach on Sept 6, 2015 17:58:28 GMT
My first four valks are done. Moving on to the Zentradi Battle Pods. Here's the first of many to come. I'm painting up 80 points for both sides so i can get a few smaller games in. Then moving to 200 points both sides for a larger game. Once i get the technique/process down for these guys i think they will fly... |
|
|
|
Post by Vhermach on Sept 8, 2015 1:43:00 GMT
Here's some pics of the finished fighter mode. These guys only need decals. V |
|
|
|
Post by Vhermach on Sept 8, 2015 1:43:44 GMT
Also painted three battle pods. These guys are fun to paint. V |
|
cliff
New Member

Posts: 31 
|
Post by cliff on Sept 8, 2015 3:49:16 GMT
Those battle pods are looking sharp! I like your choices on where to apply some of the grey on the legs.
|
|
|
|
Post by captkaruthors on Sept 23, 2015 13:25:00 GMT
Nice work. Looking forward to seeing the Glaug and more of your RDF stuff.
|
|